Tuesday, December 24, 2013

Mary did you know?

I realize this post is not food related, but I feel it is important, especially when planning for your future, to think about God. This time of year is no exception. This season, although it started as a pagan tradition, is a Christian holiday in North America. I am a Christian and I am not afraid to share my beliefs with the world. I wish you all a Merry Christmas instead of a happy holidays. If I wanted to wish you a happy Hanukkah I would have done so last month!

So with that being said, I would like to share a little lesson I learned at our Christmas eve service this year. Unfortunately this lesson really had nothing to do with what was spoken about in the service, but had everything to do with what God has been doing in my heart lately.

 I have started reading through the Bible. I have been reading since the end of October and I am already in the book of Job. It is very interesting to read through the Bible and read all of the Old Testament books with laws and demands from God upon his people. To be completely honest, I was actually angry at God when I first started reading all of the laws he expected the Jewish people to maintain on a regular basis in order to be with Him. I know it is a blasphemous thought, but I was actually thinking "God who do you think you are to demand all of this from these people?"  ...crazy right? But this is the world we live in. We think we are better than God. Well we are not. And once I wrapped my mind around this, my perspective of God and the Bible began to change. As I am reading through the Bible,I am feeling this sense of longing and yearning for Christ to come. I can feel God's impatience with his children as he gives them chance after chance to repent and come near to him.  It has really impacted my view of this Christmas season. In a sense I have viewed this season from a Judeo-Christian perspective.

 I also have a friend who comes from a Christian background who is married to a man of Jewish faith. I have had the privilege to wrestle with some of my questions about the Old Testament with her. All in all, it has been a very rewarding experience so far and I can't wait until I have reached the New Testament and everything starts to fall into place. Then, and only then, will I really get answers to my questions about the Old Testament. 

So that is part one of this story. The next part has to do with when Josiah was born and the crazy stuff we went through around that time. I won't go into too much detail, because it's on my personal blog "estranged normality" but basically my son came four weeks early after I spent 3 weeks on bed rest, and in and out of hospital for pre-eclampsia. Then we spent a week in hospital after his birth for various nicu issues. It was not fun. We lost out on 7 weeks of pregnancy. The time most people use to get themselves ready for a baby. We had no crib, no baby room, no car seat, no diapers or clothes... No blankets... Nothing. (Thank goodness for my sister in law and good friend!). We weren't prepared. And when Josiah did come (emergency c-section after 3 days of inductions) it took a good 24-48 hours for us to even really realize we had a child. Tired, exhausted and emotionally spent.... When we got home from the hospital I just cried and cried. Everyone else was more excited about our baby than I was. I was an over-tired, pre-epilepticaly high blood pressured, c-section recovering, Valium-taking wreck. I was not happy to be a parent. Not even a little bit. 

Well, as I sat in our Christmas Eve service, the band started playing a peppy randition of hark the herald angels sing. And I suddenly realized I wasn't ready. Spiritually, I mean I am only on the book of Job! It's not time for Christmas yet! And then I thought about mother Mary... Oh my goodness... This is the first year I have ever identified with her for real. She lost out on several nesting weeks because of a stupid census. She had to ride on a donkey while 8-9 months pregnant (we assume). She delivered in hay and crap with no medical staff, no doctor, no monitors, no one to check her baby's vitals.... No diapers or wipes or heated bed for baby... No pain killers....

And after that after the agony and humiliation of having her fiancé (who has never seen her naked) deliver her child (who is not his) in a culture where men were never in the room for baby deliveries... After holding God, trying to clean up baby God's tar-poop without diapers or wipes, no sleep, surrounded by filth, her own internal blood and water... Some shepherds come to say hello. ... The bible says she "pondered these things in her heart". I think that's code for "Mary kept her mouth shut because she wanted to say "go away you stupid shepherds! Can't you see I am in the worst place I have ever been!?!?"

"... Hark the herald angels sing.... Glory to the newborn king... The heavens rejoiced... And I bet Mary was crying... Joseph was probably as depressed as a young man could be, having not been able to prevent the current situation and humiliation on his fiancé. 

A merry Christmas indeed. Mary had no idea what it would all mean. She didnt know what would happen when she got pregnant. Her birth plans definitely didn't materialize how she expected. She never got to experience newlywed bliss with Joseph... Mary had no idea what "save us from our sins" would mean when she raised her sweet little boy.  

But one thing she did know: God is to be trusted and obeyed. And this she did well. And I think we all owe her a "thank you" whether you think "mother Mary" deserves a place in the church or not. 

Monday, November 18, 2013

Paleo Mini pumpkin pies!

Oh my goodness!! I was so pumped when I discovered this recipe on Pinterest that I had to try it right away!(Credit: 
http://thepaleomama.com/2013/09/pumpkin-pie-in-2-minutes/ ) I did alter it a bit though, especially in cooking time. 


This is all you need for the crust. Coconut, almond flour (aka ground almonds), coconut oil (or lard if you prefer, but coconut oil adds a lot of health to the recipe) and a pinch of coconut sugar (or brown sugar). Also make sure you are buying unsweetened coconut. Sweetened coconut is not only pointless but has way more calories and chemicals that don't help your body at all. 


I started by melting 1/2 a cup of coconut oil. (Keeping in mind that this is going to make six servings of pie)
I then began alternately adding tablespoons of coconut and ground almonds until I reached a stirable yet thick consistency. 
I used about 10 tbsp of each, coconut and almond flour. But depending on the coarseness of your coconut (mine is quite fine) you may need more or less of it. Start with eight tablespoons of each and work from there. 
Next I divided the mixture and pressed it into three ramekins. Then, if you want, sprinkle it with some coconut sugar. I think it needed this since the crust is not sweetened at all. When I would eat a piece of this pie, I could tell the crust wasn't sweet when I hadn't done this step. 
Next are your pie ingredients... Yup! That's seriously it!! No evaporated milk, or milk replacers necessary. Just goodness.
Measure out roughly 1/3 cup of honey (you can see I take measurements Farley loosely) and 1 1/2 cups of pumpkin purée. 
I like to combine the honey, pumpkin and 3 1/2 tsp pumpkin pie spice first before adding the eggs, since I use creamed honey. It's just easier that way. 
Next stir in your eggs. Your filling is done now!

Divide it between your three ramekins, and pop each one in the microwave for 3-5 minutes (until it isn't wet in the middle and feels a bit firmer to the touch)
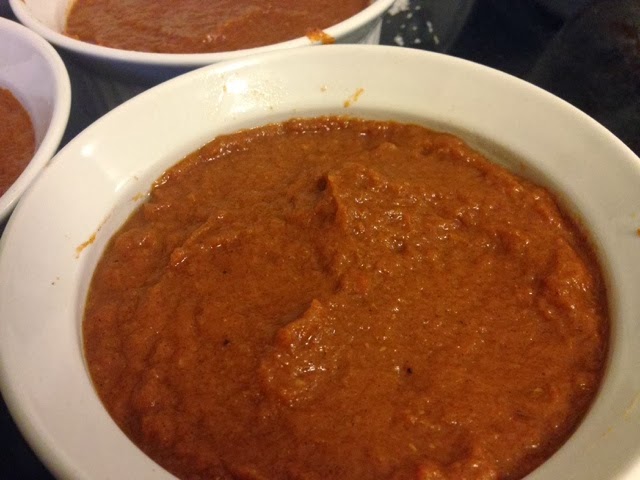
Ta da!

But what pumpkin pie is complete without whip cream? Don't be fooled by the dairy free lifestyle. We can still indulge. 
To make coconut whip cream, you need to refrigerate a can of full fat coconut milk for at least 12 hours. (if I am in a hurry I do 1-2 hours in the freezer, but DONT forget about it!)

It should be very stiff...
When you open the can you will notice there are two parts. The cream and the water. If there aren't two parts to your coconut milk, then unfortunately you bought a cheaper can and it is mostly water. This only works with good quality coconut milk. (Tip: you shouldn't be able to hear the milk shake when you shake the can in the store. If you can, it's not premium stuff)
So scoop out the hard stuff and drain (save for smoothies) the liquid. 

Add whatever you would normally add to your whip cream: in my case, vanilla, sugar and pumpkin pie spice. You could omit the sugar or use stevia even. I wouldn't use a liquid sugar like maple syrup or honey though. 
Next you whip it with an electric mixer for 2-4 minutes until you are happy with the texture. It doesn't stiffen the way whip cream does, but stays more soft in texture. 
Top your pie and enjoy!
So tasty. I think it actually tastes better than store bought pies!

I like to store these in the freezer since I often have to bring. My own dessert to functions (being dairy and soy free) 

Cut each piece in half, top with whipped cream and put on a pan or container to freeze. Once frozen you can wrap it in Saran Wrap since the whip freezes solid. Then just take one out and unwrap it when you need it. Let it thaw on the counter or just microwave it for 12 seconds. 

Paleo pumpkin pies:
Crust:
1/2 cup coconut oil
8-10 tbsp unsweetened coconut
8-10 tbsp ground almonds
1 pinch of coconut sugar (opt)
Pie:
1 1/2 cups pumpkin purée
1/3 cup honey
3 1/2 tsp pumpkin pie spice
3 eggs (free range are better)

Melt coconut oil, and alternately add almond meal and coconut until you get a soft oatmeal cookie dough-like texture. Divide and press into three ramekins. Sprinkle with coconut sugar if desired. 

Combine all ingredients for pie filling and divide into the three ramekins. Microwave each one on high for 3-5 minutes until the centre appears dry and firm. 

Top with coconut whip cream. 


Coconut whip cream:
1 premium can coconut milk-chilled
1 tsp vanilla
1/2 tsp pumpkin pie spice
1 tbsp white sugar

Chill coconut milk well. scoop out the hard top layer and whip with remaining ingredients for 2-4 minutes. 

Monday, November 4, 2013

Nutritious re-fried beans

Okay so re-fried beans have this unfortunate and un-true reputation for being a sinful unhealthy snack...? Even the Canned stuff is just beans salt and water most of the time! ...of course I personally think the canned Refried beans smell like dog food... So NATURALLY I found me a winner of a recipe!

This recipe comes all the way from Mexico! ...okay, all the way from the little old Mexican lady who works at the little Mexican shop on henderson highway.... But she is legit! 

Curtis and I are huge Mexican fans. You would think my dairy free lifestyle wouldn't allow for that, but it's surprisingly easy and tasty to have Mexican without cheese or sour cream. My secret? These re-fried beans! They are so flavourful and creamy smooth that they easily replace the cheese. 
These were my ingredients. Peppers, garlic, onion, beans, oil and salt. 

Start by chopping up your veggies. 
Did you know there are male and female peppers? I learned this one from my uncle. Male peppers have three humps and females have four. 
Cut them open and the female peppers have more seeds than the male ones. (It's hard to tell with these cause these ones are very small and both don't have seeds really...). Female peppers are sweeter and better for eating raw and male peppers tend to stand up better for cooking. In my case these ones are both being cooked cause they are getting wrinkles... :)

I usually use one large or 1-2 small peppers, 1 medium onion and 2-4 garlic cloves (depending on how garlicky my mood is)
Chop the peppers about the same size as your onions. Nice and small. 
If you want to use some hot peppers to make it spicy, add them here. The little Old lady from the store told me that if you are using fresh peppers you need to use all fresh peppers. If using dried (like in enchilada sauce where you use dried ancho's) then you would use dried hot peppers too. The consistency this way makes a difference in the end flavour. 
Next put 1/4 cup of coconut oil in a pan and start frying (this is my personal reduction from 3/4 cup). In this batch I actually used canola oil because you really can taste the coconut oil in this recipe (which I love but my husband and extended family, not so much!). I often will make a batch of these and freeze portions for myself since my husband is a coconut oil hater... :) there are just some things you can't sneak it into. 

So use your preferred frying fat here. I hear grape seed oil is good for frying too (higher smoke point) but I haven't owned/experimented with it yet!
Fry it up till it's good and soft like this. You want your peppers well cooked and your onions clear. 

You can also add some sneaky ingredients here, just cook it in well.  Eg: I have put kale in these and my husband didn't notice other than the color (which I just told him I used a green pepper). Even after I told him it was in there, he liked them. You could easily incorporate spinach, zucchini, squash, etc...

Rinse and drain your beans and add them here. You can use any kind of beans. Usually I use black since that makes the nicest end color, however in this case I was out, so I used kidney beans which taste the same in the end, but give a lighter color, which can sometimes throw people off. 

Next add 3/4 cup of water to the pan and bring it to a simmer to heat it all up. 
Next just throw it all in your blender with a bit of rock salt and blend away!
You can eat these by the spoon full, use on quasidillas instead of cheese to hold things together, in burritos, enchiladas or my personal favorite, layer them with beans, beef (or bison), peppers, onions and a bit of cheese ---bake--- then top with tomatoes and shredded lettuce!! Yum!!! Serve with chips, pita wedges, or even over some Wild rice for supper!

Nutritious re-fried beans:
1 can black or kidney beans
1 med onion
1 large bell pepper (green tastes best)
2-4 cloves garlic
Pinch of salt
1/4 cup coconut oil
3/4 cup water

Dice your onion, garlic, and peppers. Fry in the oil until very soft. 
Rinse and drain the beans and add to the pan. Add the water and bring to a simmer to heat throug. 

Put everything into your blender with some salt, and blend until smooth. 

Use as desired. 

Thursday, October 31, 2013

Paleo protein bites

So these are addicting... I must say... Very healthy though so it's all good!! Part of the reason I made this is my never-ending appetite since I started lactating... It's just rediculous... But this awesome snack isn't just for nursing mothers!! This one packs a man-sized punch of protein and a hippie sized portion of fiber and goodness! :) 

It all started with a Pinterest post... Which I can't get to since Pinterest won't let me log in. So I can't even give'em credit. Oh well. I changed it so much this one is definitely an original recipe!! (Stupid Pinterest....)

This recipe can be made into bars, bite-sized balls, or a crumbly mess you eat like nuts. (My personal favourite)

This is just to show you what I used. Nothing fancy. (And I ended up not using the dates since mine got too thick). The only thing from a health food store is my protein powder (and if you aren't avoiding dairy and soy you can buy this stuff anywhere too). Everything else is superstore (loblaws) or bulk barn. That bottle of vodka is actually home made vanilla. (I had to use store bought though, because this batch of vanilla is still infusing till December... I like it good and strong!). But I encourage you to make your own vanilla! It's just vanilla beans (Costco or bulk barn) and vodka. Cut your beans in half length-wise and put them in the bottle. Give it a shake every few days or weeks and use it 2 months later. 
ITS NOT TOO LATE TO MAKE SOME FOR CHRISTMAS!

Anyway on to this recipe! This makes a great breakfast in a hurry, work out recovery or a great carry-me-till-supper snack! It's awesome for preventing cravings. 

First you need to choose a healthy nut butter. I love using almond butter for cooking. If you have to use something unsweetened anyway, may as well make it one of the healthier ones out there! If you can't have nuts use sunflower or sesame seed butters. These are also healthy options.  I like to buy mine from bulk barn because they keep it churned and you don't get that oil slick on the top that is always in the grocery store containers of natural nut butters. I also like to make fresh nut butters in my blender when I have time, energy and nuts. Either way I store it in the fridge and that seems to prevent separation in the butter. I hate trying to stir that stuff up since the almond butter is so dense. And you want to save all that omega three oil cause it's good for you!! I always spill it trying to stir it in. 

So use 1 cup almond butter and 1 cup maple syrup. You could use honey here if you don't have access to maple syrup, however I tried this with honey and didn't like it. The honey taste was very over powering. I didn't enjoy it. Perhaps agave nectar or another natural syrup would work if you don't have maple syrup. 


Anyway, warm those two up a bit so you can stir them together. At first they don't mix well and it almost looks like the almond butter will stay as little curds in the maple syrup but keep stiring and it turns into a nice smooth paste!
Next I added my fine powders. 3 tbsp cacao powder (this is an un-processed cocoa that has more antioxidants and less caffeine or allergins like dairy and soy). You can use cocoa too or even carob powder. And 2 scoops of protein powder. I don't think I would normally add this since there is plenty of natural protein from the almonds, but I just happened to have this vegan organic sprouted grain and legume based protein that is raw and fantastic ( vita health... Check it!)

Stir this up and gaze longingly into that fudgy bowl. Take a big spoonful and eat it guilt-free my friends! (Ok... It's still got calories... But at least they are smarter calories!)

Next come the oats. I used three cups but I would do more like 2-2 1/2 next time since I like adding extra seeds and nuts. You will need to mix with your hands at this point as if you are making hamburger patties. It's fun. Take another bite! :)
Next add 1-1 1/2 cups of extras. I used some 71% coca chocolate chips from superstore (in their gluten free aisle), sunflower and pumpkin seeds. If I hadn't used so many oats I also would have added 1/2 a cup of hemp seeds instead of 1/2 a cup of oats. A bit more protein there too. You can also add flax meal or chia seeds for more protein power!  This is a very flexible recip that way!
Now you can choose how to end yours. You can press it into a pan like this, chill it and cut it into bars. 

Or you can make it into little patties/balls for smaller portions,
Or (my personal favourite) just throw the crumbly mess into a ziplock in your freezer and take out a cup full when you want a snack to munch on!

There you have it! I love this one because it is so flexible and open to interpretation! I added 2 tbsp of brewers yeast to mine for an added antioxidant punch and because it supposedly boosts a mother's milk supply. This kid's gotta eat you know!! 

Paleo Protein bars-balls-bites-bits

1 cup natural almond butter
1 cup maple syrup (or honey, but it is a strong flavour in this recipe)
2 scoops protein powder (optional)
3 tbsp raw cacao (or cocoa)
2 Tbsp brewers yeast (optional)
2 1/2 cups rolled oats
1 1/2 cups healthy add-ins (seeds, nuts, fibers, brans, meals , raisins, dark chocolate etc...)

Heat syrup and butter until warm and mixable. Stir together. Add cocoa, protein (if using) and yeast (if using). Stir together. Add oats and mix with hands when it gets too hard to use a spoon.  Choose add ins and add to mix. (I used sunflower/pumpkin seeds and dark chocolate chips). 

Option 1: press into baking dish, chill and cut into bars
Option 2: form into balls or patties and chill
Option 3: pour crumbly mix into a container and use as desired. 

Store in an air tight container in the fridge or freezer. 

Friday, October 18, 2013

Dairy free whole wheat apple pie

So there are sort of two things you can take away from this blog post: 1) a nutritious pie crust recipe 2) my method for making pies. 

Pie is one of those things where... Who uses a recipe? So often that leaves us young'ens questioning how to put a decent pie together. Well thanks to some early teenage curiosity, I have actually been making pies for years already and had plenty of trial and error!

This pie crust recipe was a simple attempt to health-ify a very unhealthy pastery. I prettymuch always just use the recipe on the tender flake box, however that makes six crusts!! I only need two, and it's some very annoying math to divide the ingredients. I admit, I have always hated pie crusts... Dry and flaky... Yuck. No thanks. Hand me a soft juicy cinnamon bun if I have to consume that many calories!! Despite this hatred, I have been complimented countless times on the flakiness of my crusts. I actually enjoyed this crust myself. The men I served it to "prefer a more traditional crust". ...but who wouldn't complain about all whole wheat crust? So it's kind of optional with this recipe. There's still some good methodology here you can take away even if you don't need or want a healthy pie crust! (And seriously the tender flake recipe is dinamite all on its own). 

So to make the crust you put two cups of flour (white or whole wheat or any combination of the two) in a bowl with a tsp of salt. Stir that up. I used all whole wheat cause I like fiber... :)

Add 3/4 cup coconut oil (or lard if you are serving picky eaters... I find the coconut oil actually makes a flakier crust, though you can taste it in this recipe... Which I like personally). It also makes biscuits way flakier FYI. And you can't taste it in them. 

Cut in the coconut oil with your pastery blender (looks like a potato masher only it has long blade-like pieces instead of a flat masher). 
It should start to look like this (coarse oatmeal)
Next comes the tricky part. 
Crack an egg into a small bowl and beat it very well. It should all be one color, no whites floating in there, and the yolk well incorporated. 
Put roughly 1 1/2 tbsp egg into a liquid measure. (I did three scoops with a measuring tablespoon cause it is impossible to actually fill the spoon. The egg slips out... So I did three half-full tbsp). Add a tbsp of vinegar to the measure, then top off with cold water to make 1/3 cup of liquid total. I used apple cider vinegar simply cause that's what I had on hand, but normally I would use plain white vinegar. 
Stir this into the dough, eventually using your hands to make a dough 
Here is where some method comes in. Pastery is always flakier if it goes into the oven cold. However with coconut oil you can't simply roll out the dough once it is chilled. The oil gets quite solid in a fridge. 

So I roll it out while it's warm and put it in the fridge pre- assembled
Your bottom crust is very forgiving, since it is about practicality vs appearance. Roll it out approximately then start patching here and there with the bits that hang over. 
Steal a bit from your top crust portion if needed. The top generally doesn't need to be quite as big anyway, since it goes on a bit flatter. 
Cover your crust with Saran or waxed paper and put something inside it to hold the paper in place (not necessary for Saran. This is just to prevent it from drying out in the fridge)

Next roll out a big round circle  of dough for the top half between waxed paper. Put this in your fridge flat. If you bend it in half it will just brake when you try to straighten it later, leaving you with a big seam down the centre of your pie. No one wants that.
While your crusts are chilling pre-heat your oven to 425 degrees. 
Now start peeling them apples. 

I swear by Granny Smiths for pie. The apple really does make the pie. If you use the wrong apple you will have apple soup instead of apple pie. You want a good firm apple that will hold its shape and add a bit of tartness. I hate eating granny's raw but they are still the best in a pie. Second choice would be macintosh. 

The next methodology part is how you cut your apples. The smaller the pieces, the less likely you will be to make soup instead of pie! So cut them small! I know wedges look pretty but they also make things watery. 

I start by quartering my apples, then coring them. 
I take each quarter and cut it into four slices. 
Then I cut the slices across into four sections again.  16 pieces from each quarter. So quite small!

Next mix up your thickener/spice/sweetener. You can play a bit here. This makes a nice sweet pie. If you like yours a bit more tart, use less sugar. You can use whatever spices suit your fancy too. I used 2 tsp cinnamon, 1/3 cup sugar, 1/3 cup white flour, 1 tbsp corn starch. The flour and corn starch are thickeners. This is a maximum thickening amount I would use for a six apple pie. It makes a nice pasty filling. Not at all watery but not dry either. If you like your pies to be more juicy you can tweak this to your liking. I am just a bit paranoid about making pie soup...

Now you are ready to pull your crusts out of the fridge. Start with your bottom crust, leaving the top in the fridge.
Put two tsp of your mixture into the bottom of your crust and swirl it around to cover the bottom evenly. 
Mix the rest into your apples directly. 
Now put your apples into the shell. You want them to be nicely heaped for aprettier pie. I used six apples and this is quite a shallow pie plate. You may need to use more depending on your pie plate.
 Cover the apples with your top crust and pinch the edges by pressing your thumbs into the dough. Then cut slits into the top of the dough for steam to escape. You can make a heart, a face or just boring old lines like this one. 
Next generously brush your pie with the remaining egg mixture. It's okay if it puddles like this. It'll all soak in leaving a nice glossy finish. 

I sprinkle the top with cinnamon and sugar after I egg it.
When I bake a pie I always put a pan on the rack below incase the pie gets juicy and needs to drip somewhere. I don't like  cleaning my oven...
Bake at 425 for 15 minutes to get a browning on the crust. Then turn the oven down to 350 for 40-60 minutes depending how firm you like your apples. 

And that's it!! It's just that easy. 

Whole wheat coconut oil apple pie
2 cups whole wheat flour
1 tsp salt
3/4 cup coconut oil 
1 1/2 tbsp beaten egg (reserve remainder for egg wash)
1 tbsp vinegar (white or apple cider)
Cold water to make 1/3 cup of liquid

6-8 Granny Smith apples
2 tsp cinnamon
1/3 cup white flour
1/3 cup sugar
1 Tbsp cornstarch

Combine flour and salt. Cut in coconut oil with a pastery blender. In a liquid measure, combine 1 1/2 tbsp egg, 1 tbsp vinegar and enough water to make 1/3 a cup of liquid. Add liquid to dry ingredients and mix well. Knead on counter and divide into two parts (one slightly larger for bottom crust is fine). Roll out bottom crust and place in pan. Cover with Saran and refrigerate. Roll out top crust between waxed paper and refrigerate flat. 

Meanwhile peel and chop apples. Combine the cinnamon flour sugar and corn starch and toss with apples, reserving 2 tbsp to sprinkle on your bottom crust. 

Remove bottom crust from fridge and sprinkle 2 tbsp of the sweetener-thickener into it. Top with apples and then top crust. Pinch crust shut and cut some air vent holes in the top. Brush with remaining egg yolk.

Bake at 425 for 15 minutes and then turn the oven down to 350 for 50-60 minutes. 

Cool and serve!