Saturday, September 28, 2013

Homemade tortillas

One thing I have learned on my dairy and soy free journey is that it is very difficult to find tortillas I can eat. I figured they would be easy enough to make and I was right. Good old Pinterest to the rescue. However I did alter things to make it healthier. I used whole wheat instead of white flour and coconut oil instead of butter or lard. (Even my pregnant sister in law said she couldn't taste the coconut oil in this recipe!).

Not only are these much tastier, but have you ever read a tortilla package? Why!? Why all those ingredients? I will never know...

Here it is!

It's all basic ingredients. Just mix your dry ingredients, cut in coconut oil and then add water. (On a side note, coconut oil should be a solid at room temperature not a liquid. That is why you can use it to replace butter and lard in baking so well!) I love using coconut oil for things that require "cutting" or "pastry blending" because it is nice and soft already and you can just use your hands. It somehow incorporates itself better than other fats. Maybe because it melts quicker than lard, so the flour and hands makes it softer. Who knows!

Once you have a dough, measure out 12 even balls and let them rest for 10 minutes or so. (If you are in a rush, you could skip this since its not a yeast dough).

 I like to cover mine with a damp cloth so it doesn't get dry. 

Next roll out the balls into tortillas. You don't have to do them all at once like this, I usually roll one out while the previous one is cooking. (An assembly line style thing). That way they don't dry out. 

They don't have to be perfectly round either. You will notice that one of my tortillas near the back of the photo didn't get the "round" memo at all... It decided that square is the new round...

Next you just dry fry in a pan! On the first side, just till you start to see bubbles forming.
Then on the second side for a little bit. It's not a science, so just fiddle with it a bit. Less time is usually better, or they get crispy, which isn't easy to work with.

Stack them up while warm and cover as you go to retain their moisture. 

That is it! Yummy homemade tortillas! There's really nothing like it. You can use this same recipe with white flour if you want. I find the whole wheat tastes better to me. More body to them...

Anyway! Here you go! Tweaked from 
http://www.smells-like-home.com/2012/07/diy-soft-flour-tortillas/

Whole Wheat Tortilla bread:
3 cups whole wheat flour
2 tsp baking powder
1 heaping tsp table salt
1/3 cup coconut oil
3/4 cup warm water

Mix flour, salt and baking powder. Crumble coconut oil into flour mix with forks at first and then your hands until It resembles quick oats in texture. Add the water and knead into a stiff dough. 
Divide dough into 12 equal (roughly 2 oz) balls and let them rest for 10 minutes, covered with a damp cloth. 

Roll balls out into 6 inch tortillas, and dry-fry in a cast iron pan on both sides. 

Stack completed tortillas and cover to keep moist and warm. 

Serve immediately or store in fridge/freezer. 

Homemade granola

So I even did this ahead of time so I would be able to post amidst our chaos... No such luck! Here we go!  This recipe has been lovingly altered from my mother-in-laws recipe! nothing beats home cooking. 

Homemade granola!  (If you want to know about the chaos in our life, you'll just have to wait for a personal blog post on my "estranged normality" blog)
Granola is super easy to make and so much healthier than store bought. This is the only cereal I eat now. A little almond milk and an apple cut up with granola... Nothing tops it for a hunger crusher!!

First you bake the oats for a while to get them good and dry, with a little crunch. 

Then it gets fun. You melt together your sweetener and your fat. I always use honey and coconut oil. Now, you may be thinking "well Krysta that's a lot of sugar and fat!" And to that i say, "read the nutrition facts and ingredient list on your granola... This is much healthier. It is a healthier sugar and a healthier fat, and less of it! Your body will use it properly, and digest it with proteins (nuts and seeds) and healthy carbs (oats and fruit)

After your oil and sugar are melted (coconut oil should be a solid at room temp or you don't have the real stuff), I like to add a splash of vanilla (homemade: vanilla beans and vodka that have soaked for a couple months).  You could also add some spice or other flavour at this point such as cinnamon, pumpkin pie spice, or a different extract such as almond. Orange zest might be nice in here around Christmas time too. Haven't tried that... (It might curdle milk though I guess). 

The other fun part is picking your add ins. 

It can be anything really. Seeds nuts brans, unsweetened raw of anything. Coconut is very nice in here. I usually add some hemp seeds, flax meal, chia seeds, and lots of pumpkin and sunflower seeds. I like to use up the last bits of stuff so this recipe had some chopped Picans and walnuts that have been sitting for a while. Almonds are always nice in here too. 

Measure everything out and combine it with your pre-cooked oats. Then spread it all on a few lined cookie sheets. 

I like to stir half way through my baking time. And the time baking is more of a suggestion. For a more browned granola bake longer. For a lighter one bake less. 

That's it!! Easy peasy! (I usually double the recipe when I make it). 

Homemade granola:
6 cups large flake rolled oats
3 cups healthy add ins
1/2 cup honey
1/2 cup coconut oil
2 tsp vanilla (or other flavour)

Bake oats on a large cookie sheet at 350 degrees for 10 minutes.  Pour into a large bowl and combine with add ins. 

Heat oil and honey until warm. Stir in vanilla and stir into dry ingredients. 

Pour into two cookie sheets and  bake one sheet at a time at 350 degrees for 8 minutes, stir, and bake another 8 minutes.

Pour back into the large bowl to cool, stirring occasionally so it doesn't all stick together. 

Store in an airtight container. 

Sunday, September 15, 2013

Paelo Chocolate Almond Biscotti

Before I start, just a little note about home made vanilla based on the feedback I received. 
1) I do not let my baby play with glass bottles. 
2) store bought "real" vanilla is 35% alcohol and vodka is 40%... So if you bake with vanilla you really shouldn't have any ethical dilemmas using homemade vanilla. 
3) it is fine in pregnancy because alcohol content is removed when you cook/bake it. Plus you only use like a teaspoon for a whole recipe... You consume more alcohol as a result of gargling listerine!
4) I bought my vanilla beans from Costco
5) there is no set number of beans to use. The more beans, the stronger your vanilla will be. I usually put 4 beans In a small bottle. When I start a new one I just add the old beans to the new ones. That way they just accumulate over time. 

Now on to today's recipe!

Oh my goodness am I glad I found and experimented with this this week!! I have been looking ahead to Christmas thinking I would have to put my healthy eating habits on hold for the sake of tradition and yummy treats! 

THIS ONE IS CURTIS APPROVED! (This doesn't happen often with my health foods)

First Paelo: paelo diet is also known as the caveman diet. Eating only foods that the cavemen would have had access to. Meat, produce, seeds and nuts... No dairy, flours, cereals, or legumes. I am not necessarily promoting this lifestyle (since legumes and dairy are both healthy) but it has amazing and drastically healthy results from what I have seen. Anyway, I like to look for paelo baking recipes because they tend to be the healthiest options out there!

I came across this web page on Pinterest and decided it must be tried.(credit given where credit is due)
 ://paleospirit.com/2012/double-chocolate-pistachio-biscotti-paleo-vegan/

I am having my bible study group over on Tuesday and I like to be able to indulge in snacks without it being a "cheat". (So get ready to sample these if you are in my small group!)
First I had to somehow come up with some almond and coconut flour. Thanks to my handy dandy vitamix, I was able to make these no problem. (But I am sure I have seen these at sobeys in the gluten free section too). 

To make almond flour, I recommend chilling your almonds in the fridge or freezer first, since there is a very fine line between almond FLOUR and almond BUTTER. I didn't chill mine because I have a special blender attachment for making dry blends (flours). If you chill them you could use a regular blender or food processor. 

Put one cup or a little more (not much more or you will get butter not flour) into your blender and pulse it several times till it starts to grind. I sifted mine (as shown above) and pulsed a second round of times. 

I did the same thing with my unsweetened coconut.   With both you will get some bits that don't sift through. I am saving those for my granola recipe. You could also put it in cookies or muffins or stir it into your nut butters for some crunch. ...or just throw it out...


On to the recipe!!
I decided to use cranberries instead of the pistachios because... I can... :) and I use a fare trade allergy free chocolate chip that is 71% cocoa (aka healthy). 

So I mixed all the ingredients together: almond and coconut flour, cocoa powder, baking powder (not sure how that's paelo but whatever), salt and maple syrup and it was more like brownie batter which is not good for shaping into a log for biscotti. (Tasted fantastic tho). I added a 1/4 cup more almond flour and my cranberries/chocolate chips and let it sit so the coconut flour and cranberries could soak up some moisture. 
And then shaped it into a "log"...
More of a blob. After baking it, it was more soft than I expected. 
(The corners kind of... Got eaten...). Because this is such a soft recipe, you need to let it cool an hour before you slice it for re-baking. 

Slicing the cookie was very interesting(difficult) because the chocolate chips stay soft. If you choose to do the chocolate chip version, make sure you do your cooling in the fridge or freezer. It will make cutting waaaaay easier. 
You put them on their side and bake another 15-20 minutes. I did 15 minutes, flipped and did another 5 (could've done 10)


Once these were done, I decided their must be a better way...

Now when it comes to flour, I always measure it fluffy and levelled. I decided to make the recipe PACKING the flour instead.  I also used honey instead of maple syrup, since many of you are more likely to try it with honey. I used less, since honey is more sweet. I used 1/3 instead of 1/2 cup. So these two adjustments resulted in a much better log!
I also chose to put slivered almonds in there instead of chocolate chips to see if it will cut easier. It did cut easier, but it was also a bit chewier from the honey and added flour, so I had to bake a bit longer after it was sliced. 

In the end I had two awesome biscottis.
The first recipe is sweeter with a richer chocolate flavour and a lighter crunch to it. 

The second has a lighter sweetness with stronger almond flavour and a stronger crunch (a good coffee cookie). 

I will write out both versions. Feel free to mix and match among them. It would also be good with vanilla added!

Cranberry Chocolate chip Almond Biscotti

1 1/4 cups almond flour (not packed)
1/4 cup coconut flour
1/4 cup cocoa powder
1/2 tsp baking powder
1/4 tsp ground rock salt
1/2 cup maple syrup
1/2 cup dried cranberries
1/2 cup chocolate chips (I use dark 71% cocoa)

Combine flours, cocoa powder, salt and baking soda. Stir well. Add maple syrup and stir. Add cranberries and chocolate hops and allow to sit for 10 minutes (or while preheating oven) to allow coconut flour and cranberries to soak up some moisture. 

Put on parchment lined cookie sheet and shape into a long narrow log. 

Bake at 350 degrees for 15 minutes. 
Cool 1 hour in the fridge prior to cutting. 
Cut loaf diagonally to create slices of cookies. Work gently as the dough is soft. Take care not to break cookies. 

Lay them on their sides and bake 15 minutes at 350 degrees. Flip and bake an  additional 10 minutes


Cranberry Almond Biscotti

1 cup well packed almond flour
1/4 cup well packed coconut flour
1/4 cup cocoa powder
1/2 tsp baking powder
1/4 tsp ground rock salt
1/3 cup raw honey 
1/2 cup slivered almonds
1/2 cup dried cranberries

Combine almond and coconut flours with cocoa powder, baking powder and salt. Add honey and stir with a spoon at first, and then use your hands as you add almonds and cranberries. Shape into a long narrow log on parchment lined cookie sheet and bake at 350 degrees for 15 minutes.

Cool for one hour at room temperature and then slice into pieces, cutting diagonally across the loaf. Lay flat on cookie sheet and bake at 350 degrees for 15 minutes. Flip and bake an additional 15 minutes. 

Cool fully and enjoy. (These are chewy when warm, not biscotti-like until cooled). 

Thursday, September 12, 2013

Cookie dough ice cream

Well I have been chipping away at this project for the last 24-30 hours or so. 
I can't eat dairy, so ice cream is a bit of a trick! Fortunately I have discovered some awesome replacements using coconut milk.

My favourite right now is:
2 cans coconut milk 
1 tbsp vanilla (I use home made)
1/4 cup cacao (like cocoa only healthier)
25 dates (pitted)
(Opt) A bit of vanilla or chocolate protein

Throw it all in your blender  until smooth and then chill 24 hrs before processing in ice cream maker. 


But then I was curious what all the hype was about egg yolks in ice cream. So naturally I decided to give it a go. 

But if I am going on an adventure might as well go all the way right? Time to try to make cookie dough ice cream!

So first I found a coconut milk ice cream recipe that uses egg yolks and tweaked it to have less sugar. 
These are my ingredients. (No that's not vodka... Not really anyway. It's homemade vanilla extract. More on that in a moment). I chose to use maple sugar because it has a nice flavour and has close to half of the sugar per TBSP as sugar has! I got mine at Costco.   I also like Thai kitchen coconut milk because it is the thickest. 

So first I cut the sugar down to 1/2 a cup of maple sugar. You stir the sugar and egg yolks together, add your milk and slowly heat up. (The recipe said do not boil, but I accidentally boiled mine and it was just fine). Basically you make a custard and add your vanilla to it. 

Then pop it in the fridge for around 24 hrs. I did 12 and it looks like this. (I would do longer next time). Nice and thick and delicious. 

Side track: homemade vanilla is super easy! It's just vodka and split vanilla beans. Let it infuse for a couple months (the longer the better) and then use as you would any other vanilla. Now I am no drinker so I'm sure you can imagine guilty little me walking into the liquor mart with my baby in his stroller. Oh the looks I got... Haha! Anyways I tried it with a small bottle and loved it. Now I'm brewing up this puppy!
Don't judge me... Christmas is coming!! (Also I don't feed my child alcohol... Just thought it was cute and he loved the glass bottle). 

Anyway! Next I whipped up my cookie dough bits. Naturally I can't leave well-enough alone. So I started with an unhealthy recipe, replacing butter with coconut oil, sugar with coconut sugar (it has a really nice brown sugar flavour but a really low glycemic index. I try not to use it too often because it is made from coconut flowers... So coconut sugar =no coconuts). I also cut the amount down from 3/4 cup to 1/2 a cup. 
I replaced white flour with whole wheat, and threw in oats cause I love them. 

Also I have a bit of a hatred for chocolate chips in frozen things. It's like biting a piece of gravel to me... So I used coconut (see the theme?).  So my cookie dough pieces were oatmeal coconut instead of chocolate chip.  

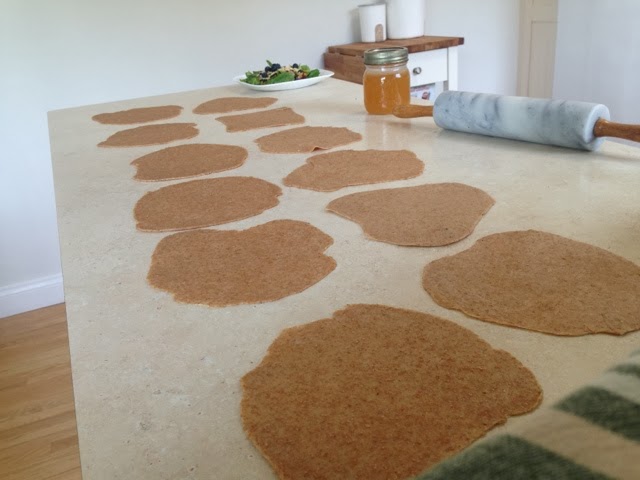
Once my ice cream custard was in the fridge, I whipped up the cookie dough and rolled it thin between two pieces of waxed paper, froze it, then crumbled it. 

This is what it looked like. Next time I think I would make tiny little balls instead just for a better end appearance. 

So now I had everything ready! My ice cream maker bowl was well frozen (I basically store it in there)
Can you spot it? Haha oh freezer space...

So first I processed the ice cream for 15 minutes. 
First it looked like this

And then it looked like this. 
That's when you know you are almost done. I like to let it run close to 20 minutes.  However, because I walked away to take pictures of my child with a bottle of vodka, this happened...
At first I thought it was over frozen but really it was just the outside layer. The inside was still a little soft. Oh well. Now I know. Stay there and poke around in there if things jam up.
Pour it all into a bowl and add your cookie dough pieces

Then stir it up and voila!!

I like stiffer ice cream so I store mine in the freezer for a bit first. This batch turned out a bit too icy. That is likely because it didn't churn properly after it jammed up, and most of the ice cream wasn't frozen enough. 

Cookie Dough Ice Cream (dairy free)

Ice cream:
- 2 cans of coconut milk
- 4 egg yolks
- 1/2 cup maple sugar
- 1 tbsp homemade vanilla (less if its fake)

Cookie dough bits:
- 1/4 cup whole wheat flour
- 3/4 cup quick oats (or another 1/2 c flour)
- 1/2 cup coconut oil
- 1/2 cup coconut sugar (or brown sugar)
- 1 tsp vanilla
- 1/4 tsp salt
- 2 tbsp coconut milk
- 1/2 cup unsweetened coconut (or mini chocolate chips)

Combine all ingredients for ice cream and slowly heat up in a saucepan. Scald and try not to boil (but if it does, it's not the end of the world). Chill in the fridge for 24 hours

Stir together coconut oil and coconut sugar. Add coconut milk and vanilla. Stir in flour, oats (if using) and coconut (or chocolate chips).
Form into mini dough balls and freeze. 

Process coconut custard in your ice cream maker for 15-20 minutes. Remove to a freezer safe bowl, stir in frozen cookie dough bits, and eat! Or freeze to stiffen.

Wednesday, September 11, 2013

A little intro to kick things off.

This is post number one on my new blog!! I must admit I am very excited about this! I have been following a healthy diet since I did the six week fat-shredder through Tyson Method (thetysonmethod.com) and discovered how much better I feel as a result. 

A little. More about my diet (incase you wonder about ingredients) I am dairy and soy free because I am pumping breastmilk for my little boy who has reflux (not fun at all). If I don't stick to it, I have to deal with projectile vomit!

I know I know. So cute and definitely worth my effort! Basically I never cheat because the consequences are not worth it! 

Going dairy and soy free really kick started my healthy living. For one thing, literally every big chain restaurant uses soy in every dish. I mean every single one. It's a marinade, it's a chemical flavour enhancer and its the cheapest commercial oil to cook with. So ya. I had to stop eating out. And when I was out and about I have learned to bring food with me!  (Also, soy is estrogenic, meaning it triggers your fat-storing hormones. So on top of being usually a salt or fat, it's also telling your body to STORE excess fat! So cutting it out makes a big difference)

The second way going dairy and soy free helped me was the dairy part. So much of what I consumed about dairy was not healthy!! Butter, cream cheese, other cheeses, creams, etc. rarely was it a glass of milk or unsweetened Greek yogurt. I have also come to learn about lots of crap in milk (hormones etc...) and can genuinely say I feel better and more energetic, less moody etc without milk stuff!! I'm not saying I won't go back to dairy once I am done this wonderful world of lactation, but it will be limited for sure. 

So I have made replacements in my life! 
1) fast salads! I make a bean salad, wild rice salad, quinoa salad etc... At the beginning of the week and that is my go-to "fast food". If I know I will be out over lunch I bring some with me! If I am home, I add some chicken breast, salmon or tuna to these and I have a nice healthy lunch. 

2) coconut oil: now that butter is out, this is all I use. For cooking, baking etc... It's even good on corn on the cob!  I won't start a rant about how amazingly healthy coconut oil is. Just google it if you are curious. It's safe to say this has been a monumentally healthy change in my life. 

3) refined carbs: this one has just sort of evolved for no reason. Pretty much everything flour based I make whole wheat now, and I use lots of other sweetener options when I bake including dates, maple sugar, palm sugar, honey, agave, and maple syrup. It's more expensive, but to me that seems better proportioned to the amount of sugar we ought to consume anyway. We shouldn't be able to buy truckloads of it for pennies. 

4) a new recipe binder: filled with healthy recipes that I can eat. I put my other one in a less accessible spot and this is what I cook from. It has made me more creative in the Kitchen and raised my standards of what qualifies as healthy to me. 

Anyway, there's a little bit about me!

My plan is to use this blog to share all my creative cooking and baking. I have been increasingly creating things without recipes and it has been going very well! I hope you enjoy this blog and find it useful.